
Identify-][ v 3.00
An easy to use hardware detection tool for Apple II computers or better. The main program version requires 64 kB of memory and a floppy drive. There is also a 48 kB version and an audio file version available for use with the cassette port.
Upon booting, the hardware detection will be performed automatically. After successful detection the user can cycle through the menu system and choose different detection result screens or other hardware test options. There is also a joystick test and a RAM test available.

Version 2.00 of Identify ][ with details of how detection happens is available as a Shack Member.

The software detects among others the following machine details:
-
Apple ][, Apple ][+, Apple ][-J, Apple /// in ][+ emulation mode
Apple //e, Apple //e enhanced, Apple //e option card
Apple //c (all different ROM versions), Apple //c+
Apple IIgs
Franklin Ace 500 and 2000
Laser 128
Tiger Learning Computer
Heuristic unknown clone detection
-
6502, 65C02, R65C02 (Rockwell CPU)
65816
65C802 as a best guess if a 16-bit processor gets detected in an Apple //e
-
48k RAM minimum (requires the 48 kB DSK-image or tape version!), 64 kB recommended and required for the full version!
16k Language Card
Enhanced 80column card with 64k RAM
SATURN RAM card
RAMExpress / ZRAM
RAMWorks
-
None
50 Hz
60 Hz
-
VidHD
Apple II VGA (V2Analog)
-
FastChip (with special report panel)
ZIPChip (with special report panel)
AppleSqueezer (with special report panel)
TranWarp GS (with special report panel)
ZIP GSx
-
Joystick: yes / no
Emulator: yes / no
Clock: yes / no
ROMX, ROMXe, ROMXc, ROMXc+: installed / not installed
-
Scanning slots #1 to #7 on every system
Scanning slot #0 on the Apple ][ and ][+ machine types for RAM cards
Gives feedback about empty slots or unidentified cards
Scanning AUX slot on Apple //e, //c, IIgs computers for 80 column cards
-
Built-in database with over 120 cards for example:
Apple2-IO-RPi Card,
BOOTi Card,
RamFactor Card,
CFFA 2000/3000,
Yellowstone Disk Controller,
SCSI cards,
MicroDrive Turbo,
Serial cards,
80-column cards,
Clock cards,
and much much more!
-
A user database exists with the possibility to manually enter up to 31 new cards that are not yet covered by the built-in database. There is also a database editor on the disk which allows you to identify and easily enter the card data to the user database. ID2 first checks the built-in database if the card can be identified and if not, the user database gets checked for identifying the unknown card.
-
Reads out device data from cards with SmartPort capabilities
Tries to identify the connected ProDOS device and medium if possible
Feedback about name and logical slot/drive if a medium is inserted
Read-out of block size and medium usage statistic
-
Gives you full control over the joystick port of your machine
Calibrate PDL(0) to PDL(3) as Joystick #1/#2
Joystick trace field for coarse range checking of the paddle resistors
Check button #0 to #2 for function
Toggle annunciators #0 to #3 for testing connected devices
Toggle the strobe $C04x
-
Test up to 128 kB of MAIN and AUX RAM - automatic detection of RAM configuration in your machine
Up to 255 passes for burn-in tests
6 different tests performed on every single RAM byte
Flipping every single bit of RAM for searching for stuck bits
Test of the address lines of every RAM byte
Error report of the failed detection byte and wrong bits
-
Tiny tool SLOTSUCKER from ID2 V.2.11 which reads the ROM footprint of a card has now been integrated into the database editor. You can suck the ROM data from slot #1 to #7 if you have an unidentified card and add this new card to the user database.
Using the tool
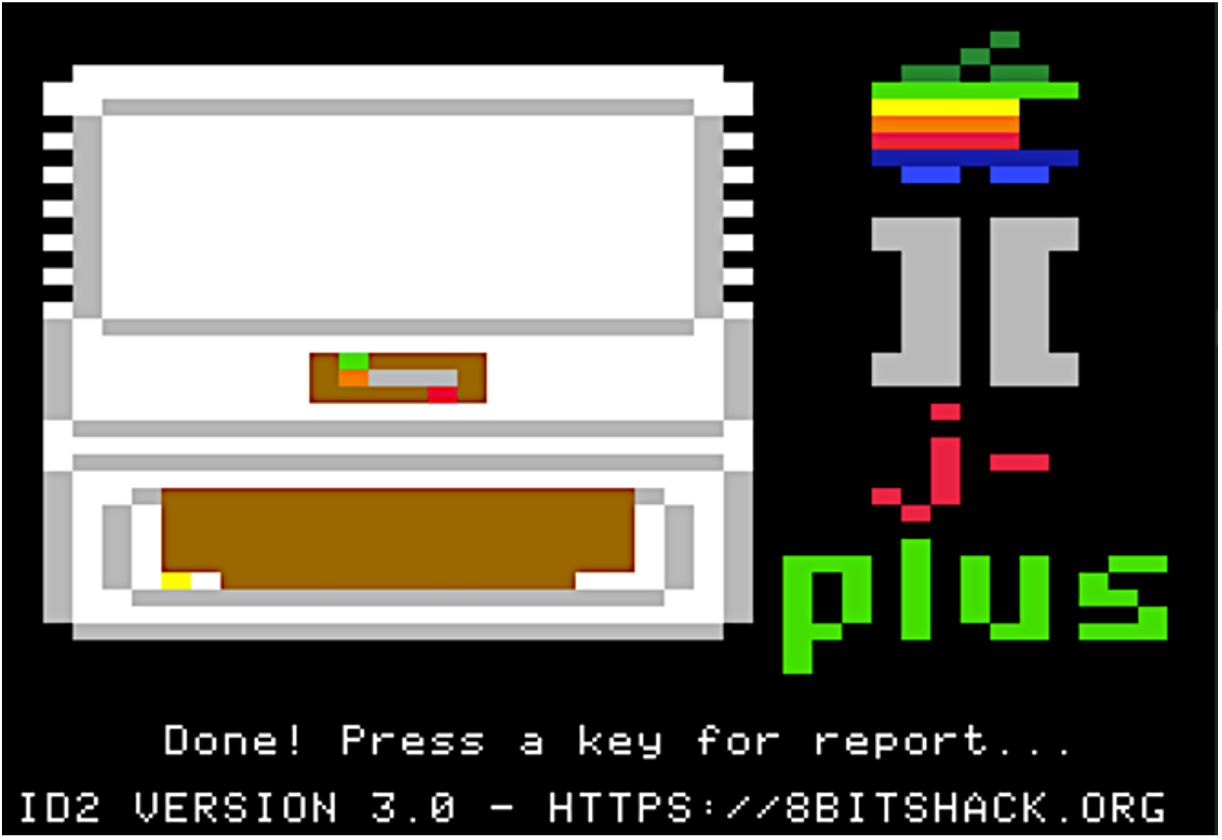
After booting the disk the user gets to the main screen and after pressing a key the main menu is entered. Pressing the left and right cursor keys cycles through the main menu options:
Detect my Apple II
Slot Scanner
Accelerator Assessment
SmartPort Sniffer
Database Editor
Joystick Justify
RAM Review
Quit
By pressing RETURN each menu option lets you choose one of ID2’s modules which will be described in the next paragraphs. Please note that all input commands are only accepted in upper-case!
Detect my Apple II
Choosing this option performs a machine type detection. The machine detection result is shown as a lores graphic screen. The machines detected are given above.
Pressing another key advances to the Main Report screen.
On the Main Report screen more detailed information on the machine type, the CPU type, RAM size, RAM cards, accelerators, the refresh rate and additional components like the detection of an emulator, a joystick or a clock is given.
Pressing M on the Main report screen returns to the main menu.


Slot scanner
This module performs a scan of the ROM area $C100 to $C7FF (slot #1 to #7) for detecting cards that have a ROM footprint on all machines. If a ROM signature was found ID2 scans first its internal and then the user database comparing the signature bytes to the databases. If a match was found ID2 displays the corresponding card name for each slot.
Some cards don’t expose a ROM footprint that can be detected, and hence specialized algorithms are required e.g. for the Uthernet II card, a Z80 card, a MockingBoard or the Apple 2 VGA card
Still unknown cards are represented by a “*** not identified ***” message. If a slot does not contain a ROM footprint ID2 checks with a special algorithm if the slot is empty and if an empty slot was found the message “*** empty ***” gets displayed.
In Apple ][ and Apple ][+ machines slot #0 gets scanned for memory cards. In Apple //e machines the auxiliary slot gets scanned independently from slot #3 for 80-column cards.
As an additional feature Slot Scanner also searches for installed ROMX-extensions. Pressing M on the Slot Scanner report screen returns to the main menu.


Accelerator Assessment
ID2 is currently capable to detect five different accelerators: ZIPChip, FastChip, TransWarp GS, AppleSqueezer and ZIP GSx. The first four accelerators can be read out and will return internal setting results in a corresponding result screen.
Each accelerator that has its own panel, as different results can be read out.
Hint: When displaying the result screen of the FastChip the accelerator speed on a connected display panel will be continuously increased and decreased until key “M” is pressed to return to the main menu (small animation demo).


SmartPort Sniffer
The module SmartPort Sniffer lets you detect devices that are connected to a SmartPort capable card (if one or more is/are installed in your system). You can cycle through all installed SmartPort cards with all connected devices.
You will get information on the name of the card and in which slot it is installed and how many devices are currently connected to it. Furthermore, for each device its ID and type, as well as the total size in blocks get displayed.
You will receive information on eight flags that can be set e.g. if READ or WRITE onto the device are allowed or not.
If the connected device contains a medium its name and logical slot and drive are shown. Remember that physical slot and drive may differ from logical slot and drive automatically assigned by ProDOS!
As a last information you see the total number of blocks used and free blocks on the medium (if a valid medium is inserted into the drive).
Pressing “M” brings you back to the main menu, pressing “SPACE” shows information of the next SmartPort device (if available).


Database editor
ID2 contains a large built-in database that covers a broad range of traditional and modern cards. However, there might have been several hundreds or even thousands of different cards now and historically.
Hence, ID2 will likely not always identify all cards under all circumstances correctly. Especially if a “*** not identified ***” will be displayed in a certain slot, the corresponding card is likely not yet included in the built-in database. In this case it is possible to add the card in the user database which has space for 31 individual cards. If you think that your card should also be added to the built-in database, please send us your user database file for evaluation.
The submodule Database Editor is a combination of an AppleSoft Basic program and machine language. Hence, the menu system needs to be left behind and the module gets loaded after the menu option Database Editor has been chosen.
After loading you will see the main screen of the Database Editor:
Firstly you will see how many cards are currently in the database and which card currently gets displayed. As this is after startup, it will likely be the first database entry, hence the first card.
Furthermore, the name of the card is given as well as the four detection bytes and their positions in the ROM footprint. Each card can have three options at the moment which represent the capabilities of a card:
CLOCK: the card has a clock function
SMARTPORT: the card supports SmartPort devices
SP READ: the devices can be read out via SmartPort Sniffer in the ID2 submodule. With some configurations SmartPort calls are not supported reliably and can cause a crash of ID2 hence the SP READ option might be needed to be switched off.


EDIT datasets
You have now the following options:
Use the ⬅️ and ➡️ keys to cycle through the available cards
Note: In a fresh installation, there is only the AppleTalk card as a demonstration object in the database. Don’t delete it if you still want an AppleTalk card to get detected!E: Edit the current database entry. See the image below to find an overview of the Edit part of the screen.
The field labeled “NEW NAME”, allows you to change the name of the entry. A total of 22 characters is available, both lowercase and uppercase are supported. You can delete the entries starting from the last typed character backwards with DELETE or ⬅️.
Cycle through the other options with the TAB key.
Toggle the options with the SPACE bar ON / OFF. These settings affect the way ID2 interprets the capabilities of a card.
Change the values of the four detection byte pairs with ⬅️ and ➡️ to the values that suit you.
RETURN: accept the settings and write the new values back to the database.
ESC: discard the changes and return to the database browsing.
Add datasets
By pressing A from the menu, you will add a new card to the dataset. The new entry will always be at the end of the database (by the current implementation). You will be dropping to the editor mask with all “empty” data fields. Please define the data fields to the appropriate values. See above for valid editor commands.
If you press RETURN, the input values will be copied to the database. If you press ESC, the input values will not be stored. Be aware that adding a card always adds a new database entry even if you press ESC to leave the editor without changes! All input fields of the new card will then remain empty!

Delete datasets
By pressing D from the menu, you can delete the current dataset. You need to confirm deletion and this operation cannot be undone so be careful! You cannot delete the last dataset hence at least one dataset needs to be in the user database. This is just the database convention.
After confirming the deletion the database gets updated and if you delete an entry in the middle the database needs to be rearranged which can take some time to complete so be patient.
Slot sucker
By pressing S from the menu you will enter the SlotSucker submodule of the Database Editor. SlotSucker was a little program in the last version of ID2 which let you suck the entire ROM data of a single slot and save it to disk for later evaluation for finding appropriate detection byte pairs.
SlotSucker is now interactive in ID2. Before you enter the submodule, you could first ADD a new card “My cool new Card” to the database entering some data for the card like its name and options. Accept the new input with RETURN and then press S.
Before the slot data can be sucked you need to enter the slot number you want to analyze from #1 to #7:
Below you can see an example of the SlotSucker screen with the results from sucking Slot #1 on my Apple //e emulator:

You will first see half of the slot ROM content (first 128 bytes) since it is not possible to display all 256 bytes of slot ROM data on one screen in 40-column mode. You will also see that one of the bytes is draw in inverse which means this is your cursor position.
On the right part of the screen, you can see the current assignment of the four card detection bytes.
The basic idea is that you can browse through the slot data with the cursor and select the four detection bytes to your needs and store them in your database such that your card can be detected now.
The following cursor commands are available in SlotSucker:
P: toggles between ROM page #1 and #2 (first 128 bytes and second 128 bytes of ROM data).
Cursor Keys: move the cursor around the ROM data in order to select the bytes you need. You can see on the bottom right which address & value you are currently highlighting.
A,Y,Z,N,M: additional cursor keys for machines without e.g. up & down cursor keys.
1,2,3,4: set the detection byte #1 to #4 to the current highlighted byte in the ROM data.
RETURN: copy the selected detection bytes to the current active card in the database.
ESC: return to the menu and discard the selected bytes.
Here is “My cool new Card” now with its new detection bytes after sucking data from slot #1:


Leaving the database editor
When you choose to quit the Database Editor from the menu with Q you will be asked if the database you modified should be saved to disk. You need to press Y here in order to make sure that your changes are saved. If you press N everything you changed will get discarded and is lost.
You will be taken back to the main menu of ID2 where you left off.


Joystick Justify
This submodule lets you test all inputs and outputs of the joystick port of your Apple ][. It is also possible to perform a simple range test of the joystick potentiometers.
The submodule is not only limited to the capabilities of the 9-pin joystick output port of the more modern Apple II models but will give you full control over the 16-pin port on the mainboard and supports up to two joysticks!
When you activate the module, you will be presented by a joystick trace field and information about the following values:
Joystick X- and Y-value read from the joystick potentiometers (PDL(0) to PDL(3)).
Joystick button #0 to #2 status: Open or Closed
Annunciator status: Low or High
Strobe status: Low or High
Moving the joystick axes will move the inverse crosshair in the trace field. You can check the calibration of the joystick’s central position and its range dynamics i.e. if for example MIN/MAX values can be reached (0 or 255) and how well intermediate joystick values are covered (PDL(0/1)). It is also possible to test a second attached joystick (PDL(2/3)).
You can choose from the following menu options:
M: return back to the Main Menu
T: Trace Mode which lets you perform a coarse complete range check of the combined joystick axes. Try to fill the whole joystick test field with inverse characters when moving the joystick. This test will give you a first impression on the fidelity of combined joystick axes for reaching all possible joystick value combinations. Press T again to leave Trace Mode.
C: Toggle the joystick strobe output pin from High to Low and back to High
J: toggle between joystick #1 and #2 (PDL(0)/PDL(1) and PDL(2)/PDL(3)) – if you have two joysticks attached to your system
0..3: Toggles the corresponding annunciator from Low to High and back to Low. Beware on Apple ][ and ][+ this might also toggle HIRES mode on and off. If the video mode changes when toggling an annunciator, you can try to toggle it back.
RAM Review
This submodule will perform a thorough test on the RAM that is installed in your Apple II. At the moment it is only possible to test standard RAM configurations up to 128 kB. There is no support for RAM card memory test now even if those cards are installed and get detected!
RAM Review tests up to 128 kB of MAIN and AUX RAM after automatic detection of the RAM configuration in your machine has been performed.
After starting the test every single bit of the RAM gets tested from $0000 up to $FFFF if possible or another address depending on your machine configuration. The test is first running in MAIN RAM. If you have AUX RAM installed the test automatically switches to AUX RAM after the MAIN RAM test has been done.
The test runs continuously if no errors are found. After the first pass the test algorithm automatically starts the next one. If you want to do a burn-in test of your setup or if you are searching for a sporadic error, you can let it run for up to 255 passes for doing a burn-in like test searching for those tricky errors. Letting the test run for all 255 passes will take several hours for an unaccelerated machine. Using accelerators will likely yield faster RAM test times.
On each single RAM byte 6 different tests are performed. Every single bit of RAM gets flipped for searching for stuck bits. Also all of the address lines of every RAM byte are getting tested. Hence you will see several test numbers being displayed when the test is running.
Since the test itself is a non-destructive procedure i.e., ID2 will remain fully operational in RAM while the test is running, RAM can only be tested in several chunks which are displayed during the test.
If an error is found the address of the byte failing is given and a table showing the bit values gets displayed. You can see which test failed and what the expected bit pattern would be and what you really have in your machine.
After an error you can decide to continue testing or exit the RAM test. The total number of errors gets counted. The bit position that failed gives you a hint which of the corresponding chips on the motherboard might have a problem since the value of a byte gets stored bitwise in the single chips.
To start the RAM test, you need to press S. in order to stop the test you can press any key. Press M to return to the main menu. If you restart a test it will always begin testing from $0000.
Hint: when testing the range $0400 to $07FF the screen regularly flickers while doing bit flipping in that range. This is the tool working properly and not a bug of the software!


Quit
This menu option leaves ID2. If you directly booted the disk you will return to Bitsy Bye. If you started the tool from GS/OS you will return there.
Known Bugs and Limitations
Following constraints and limitations of the software are known up to now:
No RAM disk support yet (to be included), however, SmartPort capable RAM disk cards will be accessible via the SmartPort Sniffer.
The 48 kB version will only detect a Language Card in Slot #0 and not a Saturn Card installed there. Other restrictions may be observed when using the 48 kB version.
A graphical menu is only available with the full 64 kB ProDOS-version of the tool. The 48 kB disk or tape version are text-only!
No special detection of Apple II clones yet (to be included) - clones will detected as the machine type they shall resemble
Only cards that deliver a ROM footprint can be detected by the tool unless there are other tricks that can be used. See e.g., below as examples the detection of a VidHD, Apple II VGA, Z80-card, a MockingBoard or the SATURN RAM Card.
Modern cards that simulate other physical cards e.g., the MegaAudio from A2Heaven will not get detected since they show up in the ROM footprint only as the cards they are mimicking so only the simulated cards will get detected. Same is true for accelerator cards like the FastChip which do not leave a footprint in slot memory where they can be detected. Those cards won’t also get detected and likely will never be.
Hint: Users with an Integer Basic machine need to use the DSK-image with the 48 kB version which boots directly the binary file. Sorry, SLOTSUCKER is not available in Integer Basic yet!
Using accelerators is known to crash SmartPort Sniffer. There seem to be incompatibilities between some accelerators and standard SmartPort interface calls. To be clear here: ID2 uses only documented standard SmartPort calls – there is no coding magic here! If your system crashes while sniffing the SmartPort you could try to inactive your accelerator or check if your card under test really sticks to SmartPort rules. There are problems with modern cards e.g. the Yellowstone controller which also shows incompatibilities.
There are for sure many yet unknown use cases that will show problematic or wrong behavior of the detection tool since detection possibilities are limited. Please report your findings to the email address given below. If you run into any problems when using the software with issues that are not reported here, please let me know: bugs@8bitshack.org
If you have cards that do not get detected by ID2 please also contact us. You can add the card to your user database and send us the detection results so we can add your card to the built-in database.
Credits
Code: Marc Golombeck, Dan Henderson
Graphics: Dan Henderson
Manual: Marc Golombeck, Dan Henderson
Additional Advice: Dr. N. H. Cham, Sellam Abraham
Special Thanks: All Beta Testers of the Apple II community!